/HubSpot%20-%20eBook%20-%20Proof%20Card%20Mockup%20001.jpg?length=1000&name=HubSpot%20-%20eBook%20-%20Proof%20Card%20Mockup%20001.jpg)
/HubSpot%20-%20eBook%20-%20Proof%20Card%20Mockup%20001.jpg?length=1000&name=HubSpot%20-%20eBook%20-%20Proof%20Card%20Mockup%20001.jpg)
/HubSpot%20-%20eBook%20-%20Proof%20Card%20Mockup%20001.jpg?length=1000&name=HubSpot%20-%20eBook%20-%20Proof%20Card%20Mockup%20001.jpg)
/HubSpot%20-%20eBook%20-%20Proof%20Card%20Mockup%20001.jpg?length=1000&name=HubSpot%20-%20eBook%20-%20Proof%20Card%20Mockup%20001.jpg)


/HubSpot%20-%20eBook%20-%20Proof%20Card%20Mockup%20001.jpg?length=1000&name=HubSpot%20-%20eBook%20-%20Proof%20Card%20Mockup%20001.jpg)

/HubSpot%20-%20eBook%20-%20Proof%20Card%20Mockup%20001-min.jpg?length=1000&name=HubSpot%20-%20eBook%20-%20Proof%20Card%20Mockup%20001-min.jpg)
/HubSpot%20-%20eBook%20-%20Proof%20Card%20Mockup%20001-min.jpg?length=1000&name=HubSpot%20-%20eBook%20-%20Proof%20Card%20Mockup%20001-min.jpg)

Updated June 2023
To run a business efficiently and successfully, it’s necessary to maintain transparency and have clear communication across all departments. When starting a new project this becomes critical as you don’t want employees struggling to find the right tools for tracking progress while communicating tasks with team members.
Given this, why juggle between applications when you can integrate Microsoft Planner with your MS Teams platform and work together efficiently?
Breaking Task Management Barriers with Microsoft Teams & & Planner
The process of defining goals, objectives, assigning tasks, and seeing them through completion, in their entirety, can become overwhelming very quickly while working on multiple projects.
Lack of proper planning and communication of priorities can lead to delays, duplication of work, deviation from the scope, reduced productivity, increased costs, and many other costly problems. By using Microsoft Teams integration with Microsoft Planner, you can seamlessly collaborate with the team, track, and customize project plans in one platform.
Microsoft To Do, List, or Planner – Which Application is Best for You?
As you are likely aware, Microsoft 365 offers an assortment of planning / task management apps, such as List, To Do, and Planner. Given this, many are confused about the differing functionality of each. Here’s a quick breakdown to deliver the clarity you need to pick the appropriate application that suits your requirements:
- Microsoft List: Best used for creating repositories, Microsoft List allows you to track or update information about your clients, employees, vendors, inventory, expenses, and more. You can track this data here and share the list on Microsoft Teams with your employees.
- Microsoft To Do: Easily track all the tasks that are assigned to you or are created by you, daily. Primarily for personal use to keep an individual prioritized and productive. Microsoft To Do easily integrates with Microsoft Teams, SharePoint, Outlook, and Planner.
- Microsoft Planner: Create, modify, and share project Kanban ‘Boards’ with your team. Microsoft Planner easily matches the features and functionality of popular project management tools such as Trello, JIRA, Monday.com, or Asana, while beneficially natively integrating with Microsoft Teams, SharePoint, List, Outlook, OneNote, and Project.
How to Use Microsoft Planner in MS Teams?
- Setting-up Microsoft Planner:
MS Planner can be integrated as a tab in any ‘Channel’ of any Microsoft Teams team. While setting up the MS Planner plan, you can either create a new plan or use an existing plan from the respective team in Microsoft Teams. To notify members about project updates, make sure to click on the post to this channel about this tab checkbox. Voila! You now have access to your Microsoft Planner plan within your MS Teams team, allowing you access to all your projects from one location.
- Organizing Projects:
A project is a collection of several tasks and at times these tasks also need to be completed by collaborating with other departments or cross-functional teams. Once these tasks are properly defined and broken down into stages, you can then start assigning them to a specific team member(s) and set deadlines to complete the task.
Let’s take a look at ways you can utilize Planner in Microsoft Teams to its full potential for efficient task management:
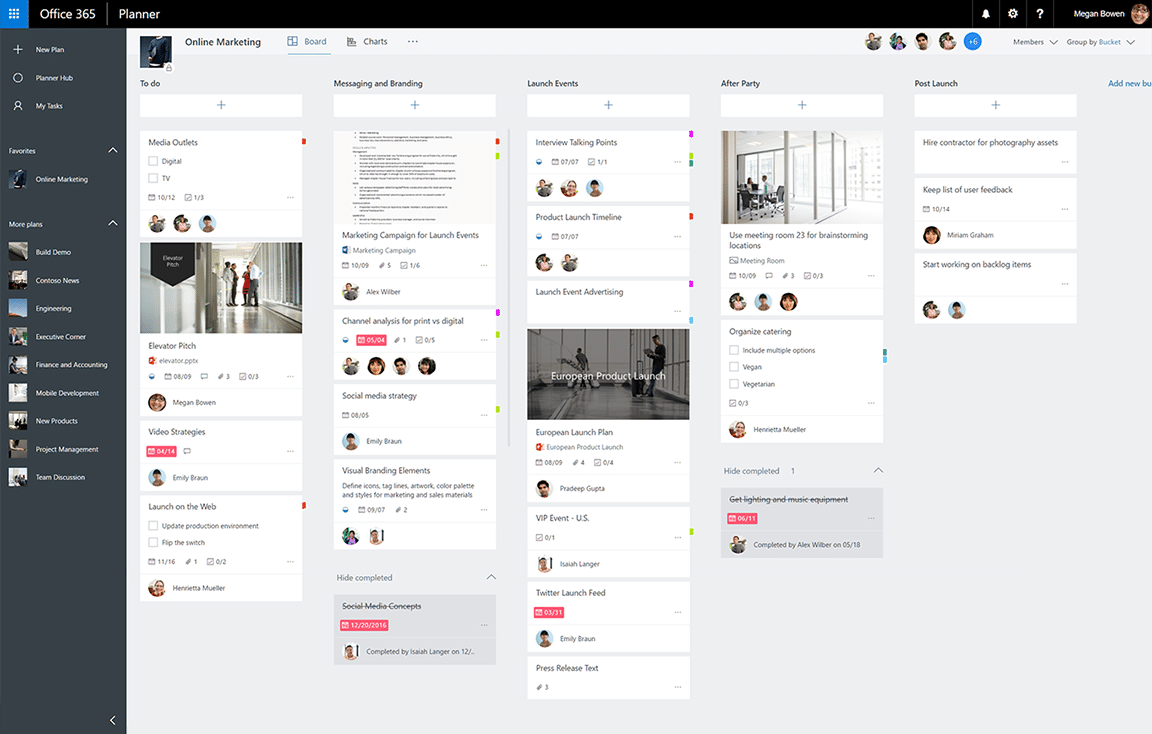
Tip #1: Create Buckets for Each Stage
Neatly divide the project into phases or departments by creating Buckets in the Board Section. The names of the Buckets can be changed according to the project stage. By creating Buckets, you are also breaking down the project’s lifecycle and defining the flow of the project. Make sure to take your time to plan the number of Buckets you may require for your project, as that will help you eliminate any redundant processes.
Tip #2: Organize Buckets with Task Cards
Within each Bucket, you can create a Task Card for every major task that is associated with it. To create the Task Card click on Add task option. That will allow you to name the task, assign it to a team member(s), and set deadlines. You can also create subtasks by creating a Checklist within each Task Card to monitor the progress on every subtask.
You can also move the Task Card to another phase or department by dragging and dropping it into another Bucket. This allows you to carry forward tasks from one phase to another or delegate responsibility from one department to another.
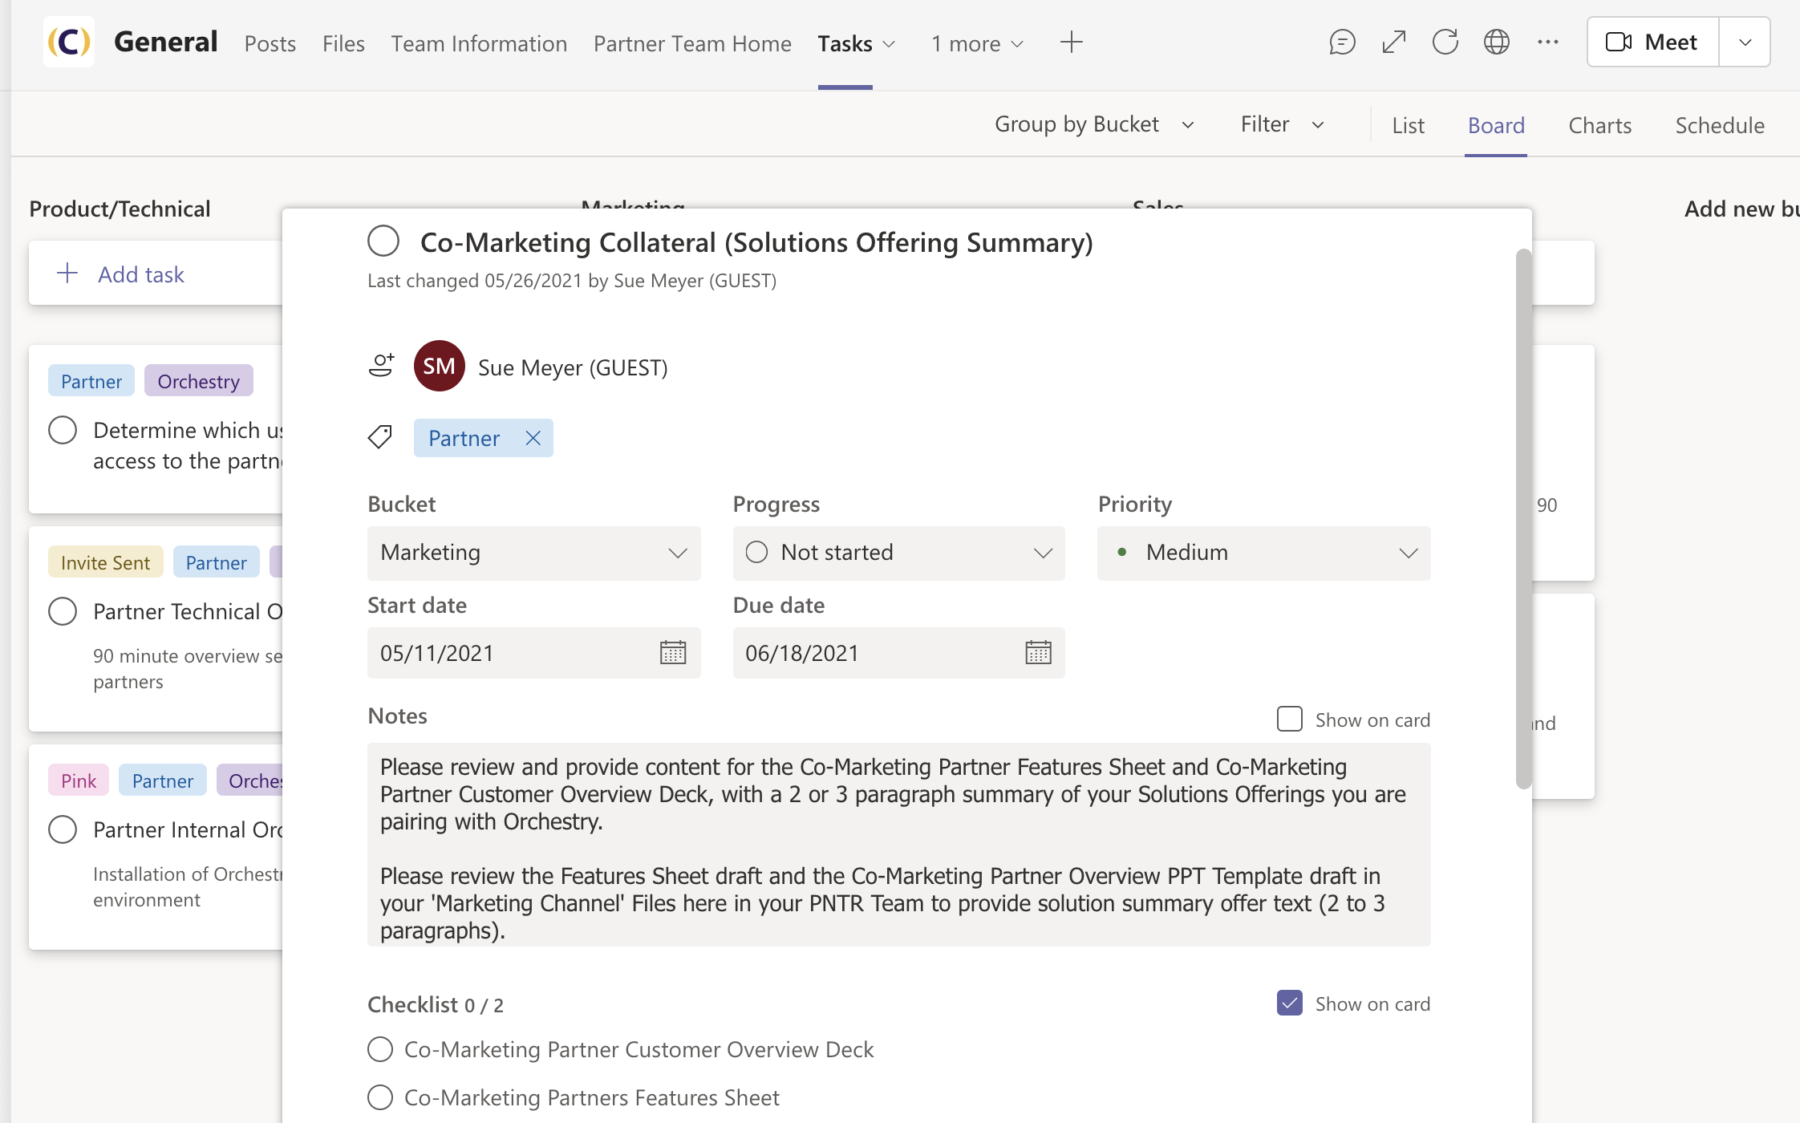
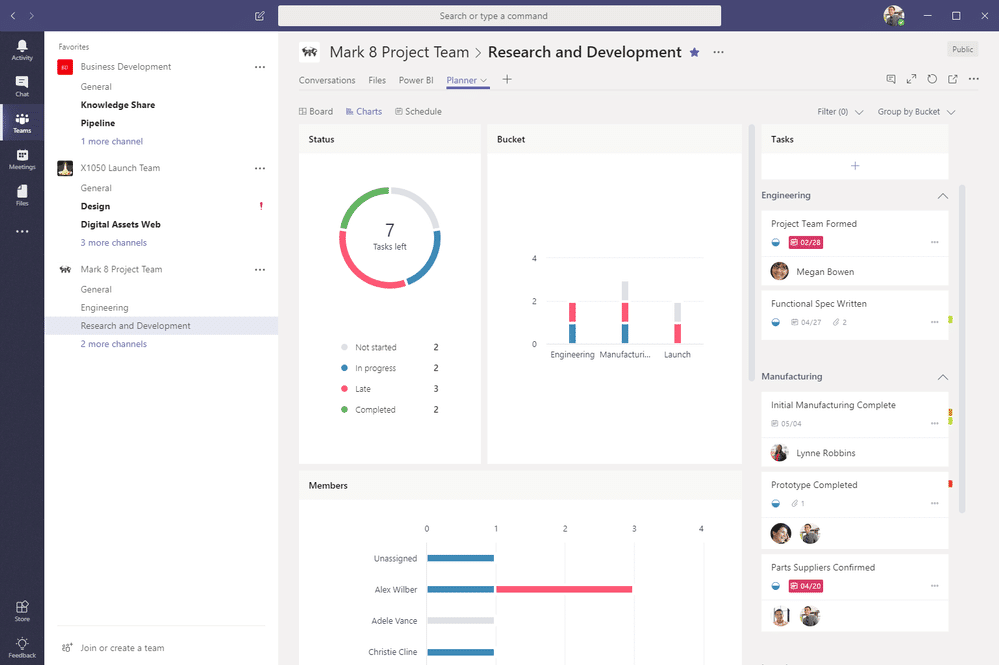
Image: Buckets and Task Cards
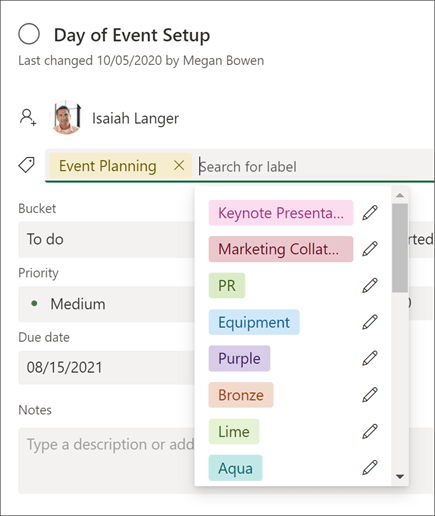
Tip #3: Use 'Labels' to Differentiate Tasks
Once the structure and the flow of the projects are created by using Buckets and Task Cards, make use of Labels to color-code and filter tasks across different Buckets.
. This will allow you to save time and find relevant results quickly without manually clicking on each task.
You can also show the progress of tasks on each Task Card by using the appropriate progress status and set priority from the drop-down list. Through this, you can notify your team about urgent tasks that need to be completed on priority.
Every Task Card also has an option to display details within each card on the Board so that you can get a quick overview of each task. This can be done by selecting the Show on card option.
Tip #4 Keep Everyone in the Loop
To make the communication process seamless with team members working on each project, MS Planner also allows members to leave notes and comments and add attachments in each Task Card to keep the project manager and team members posted about any important updates.
Every time someone leaves a comment on the task, all the members assigned to the project get an email notification. Also, a comment icon appears on the Task Card, This is extremely helpful as you never miss any updates on the task.
Since the Planner is easily integrated with MS Teams, you can do quick check-ins with your members by linking to particular tasks in chats or channels.
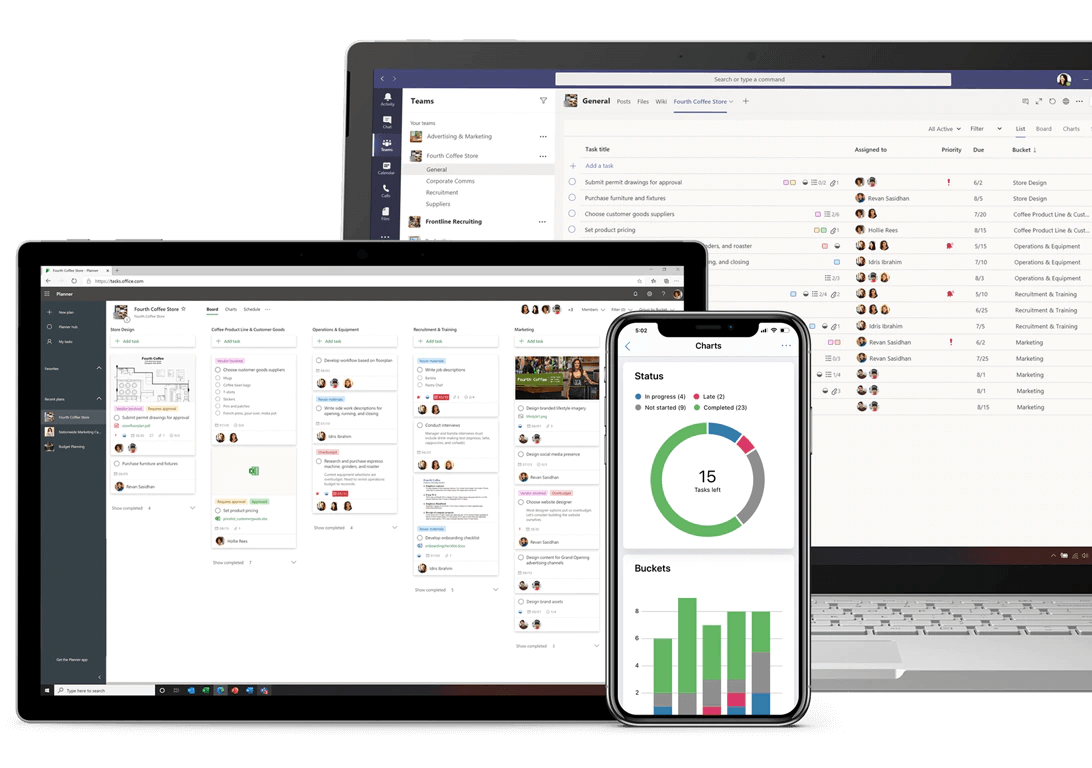
Tip #5: Personalize Your Planner Overview
Easily change the MS Planner view to suit your needs. If you need a graphical representation of the overall project status click on the Charts section at the top. This will help you collect data for your reports and track potential delays.
In the Schedule section, you get a calendar view of the projects. By clicking on a task assigned on a specific date, you can access the Task Card details and update the information, add, or modify the date.
Tip #6: Utilize the Planner File Store
If you are working on several projects and are struggling to find that vital document attached to the Task Card, Planner has a solution for that as well. All you have to do is click on the ellipses next to the Schedule section, which will bring up a dropdown list, select the Files option to access the SharePoint site that stores all your documents. You can also modify, add, or delete documents from there, and every change will be saved in real-time.
Learn more on Planner and projects, with our eBook:Microsoft Teams for Project Management
Unleash the Full Power of Microsoft 365 with Orchestry
Most organizations are not using Microsoft 365 to its full potential.
Orchestry makes Microsoft 365 simple for all users.
Orchestry takes the uncertainty out of M365, delighting even the most non-technical members of your team with preconfigured Teams templates, an informative Workspace Directory, and more!
To see Orchestry in action, request a demo and download our features sheet!
